


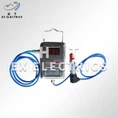

Connecting a water level sensor to a control panel is a crucial process in many industrial and commercial applications. As a leading Water Level Sensor supplier, I understand the importance of this connection and the impact it has on the overall functionality and efficiency of a system. In this blog, I will guide you through the steps of connecting a water level sensor to a control panel, providing you with valuable insights and practical tips along the way.
Understanding the Basics
Before we dive into the connection process, it's essential to have a clear understanding of what a water level sensor is and how it works. A water level sensor is a device that measures the level of water in a tank, reservoir, or other container. It can provide real-time data on the water level, allowing for precise control and monitoring of the system.
There are several types of water level sensors available on the market, including ultrasonic sensors, pressure sensors Pressure Sensor, and float switches. Each type has its own advantages and disadvantages, and the choice of sensor depends on the specific application and requirements.
Selecting the Right Water Level Sensor
The first step in connecting a water level sensor to a control panel is to select the right sensor for your application. Consider the following factors when making your decision:
- Measurement Range: Determine the minimum and maximum water levels that you need to measure. Choose a sensor with a measurement range that covers your requirements.
- Accuracy: The accuracy of the sensor is crucial for precise control and monitoring. Look for a sensor with high accuracy and repeatability.
- Environmental Conditions: Consider the environmental conditions in which the sensor will be installed. Factors such as temperature, humidity, and chemical exposure can affect the performance of the sensor. Choose a sensor that is suitable for the specific environmental conditions.
- Output Signal: The output signal of the sensor is important for connecting it to the control panel. Common output signals include analog (e.g., 4-20 mA, 0-10 V) and digital (e.g., RS-485, Modbus). Make sure the output signal of the sensor is compatible with the input requirements of the control panel.
Preparing the Control Panel
Once you have selected the right water level sensor, the next step is to prepare the control panel for the connection. Here are the key steps to follow:
- Power Supply: Ensure that the control panel has a stable power supply that can provide the necessary voltage and current for the water level sensor. Check the power requirements of the sensor and make sure the control panel can meet them.
- Input Channels: Identify the input channels on the control panel that will be used to connect the water level sensor. Make sure the input channels have the appropriate signal type and range to match the output signal of the sensor.
- Configuration: Configure the control panel to accept the input from the water level sensor. This may involve setting the input type, range, and calibration parameters. Refer to the control panel's user manual for detailed instructions on how to configure the input channels.
Connecting the Water Level Sensor
Now that you have selected the right sensor and prepared the control panel, it's time to connect the water level sensor. Follow these steps for a successful connection:
- Mount the Sensor: Install the water level sensor in the appropriate location. Make sure it is securely mounted and positioned to accurately measure the water level. Follow the manufacturer's instructions for proper installation.
- Connect the Wires: Connect the wires from the water level sensor to the corresponding input channels on the control panel. Pay close attention to the wire colors and markings to ensure a correct connection. Use appropriate connectors and terminals to ensure a secure and reliable connection.
- Grounding: Proper grounding is essential for the safe and reliable operation of the water level sensor and the control panel. Connect the ground wire of the sensor to the ground terminal on the control panel.
- Testing: After making the connections, perform a test to verify that the water level sensor is working correctly and that the control panel is receiving the input signal. Check the display on the control panel or use a multimeter to measure the output signal of the sensor.
Troubleshooting and Maintenance
Even with proper installation and connection, issues may arise with the water level sensor or the control panel. Here are some common problems and solutions:


- No Signal: If the control panel is not receiving a signal from the water level sensor, check the connections to ensure they are secure. Also, check the power supply to the sensor and make sure it is functioning properly.
- Inaccurate Readings: If the readings from the water level sensor are inaccurate, check the calibration of the sensor. Refer to the manufacturer's instructions for how to calibrate the sensor. Also, make sure the sensor is installed correctly and is not affected by external factors such as vibrations or interference.
- Sensor Failure: If the water level sensor fails, it may need to be replaced. Contact the manufacturer or a qualified technician for assistance with replacing the sensor.
Regular maintenance of the water level sensor and the control panel is also important to ensure their long-term performance and reliability. This may include cleaning the sensor, checking the connections, and calibrating the sensor periodically.
Advantages of Connecting a Water Level Sensor to a Control Panel
Connecting a water level sensor to a control panel offers several advantages, including:
- Precise Control: With real-time data on the water level, the control panel can adjust the system settings to maintain the desired water level accurately. This helps to prevent overfilling or underfilling of the tank, which can lead to costly damage or inefficient operation.
- Remote Monitoring: Many control panels allow for remote monitoring of the water level. This means that you can access the data from anywhere using a computer or mobile device. Remote monitoring provides convenience and allows for timely response to any issues or changes in the water level.
- Automation: By connecting the water level sensor to a control panel, you can automate the operation of the system. For example, the control panel can automatically start or stop a pump based on the water level, reducing the need for manual intervention.
- Data Logging: Control panels often have the ability to log the water level data over time. This data can be used for analysis and troubleshooting, as well as for compliance with regulations.
Conclusion
Connecting a water level sensor to a control panel is a relatively straightforward process, but it requires careful planning, proper installation, and regular maintenance. By following the steps outlined in this blog, you can ensure a successful connection and enjoy the benefits of precise control, remote monitoring, automation, and data logging.
As a Water Level Sensor supplier, I am committed to providing high-quality products and expert support to help you with your water level monitoring needs. If you have any questions or need assistance with connecting a water level sensor to a control panel, please feel free to contact me. I look forward to the opportunity to discuss your requirements and help you find the best solution.
References
- Manufacturer's documentation for water level sensors and control panels
- Industry standards and guidelines for water level monitoring systems